


.svg)
.svg)


Get Business Email
No domain name required
Create No-reply Email
Explore Neo today!

Are you a small business looking to automate your communication while also managing the number of incoming emails? Then, you must have heard of a no-reply mailbox! These mailboxes, which are prevalent in the modern world, are configured only to allow sending emails. Hence, they can not receive any responses back. Organizations often employ this setup to avoid receiving an overwhelming number of responses, manage incoming and outgoing emails, and ensure their communication remains seamless.
A no-reply mailbox is essential for keeping a business’s operation smooth, avoiding spam, and guiding the recipients to the right section in the event of any questions or concerns. It also assists in automating processes, including order confirmations, transaction emails, and marketing outreach email sequences.
Are you curious about how to set up this system with your email provider? This blog will help you find the answers to all your pressing questions. Follow this guide to set up a no-reply mailbox easily and efficiently.
How to Create a No-Reply Email Address in Google Workspace?

Google Workspace is the paid enterprise-level solution containing all of Google’s tools, including Gmail, Docs, Drive, and others. It is one of the most popular productivity and communication platforms for businesses of all sizes.
Setting up a no-reply mailbox in Google Workspace is very useful for sorting communication effectively, for example, in the case of an automated message or a notification that does not require a response. This process is simple and requires configuring specific routing rules in your Google Workspace Admin console.
Step 1: Sign In to Google Workspace Admin Console
- Start by going to the Google Workspace Admin console with your sign-in details at admin.google.com using the administration account that you have on the site.
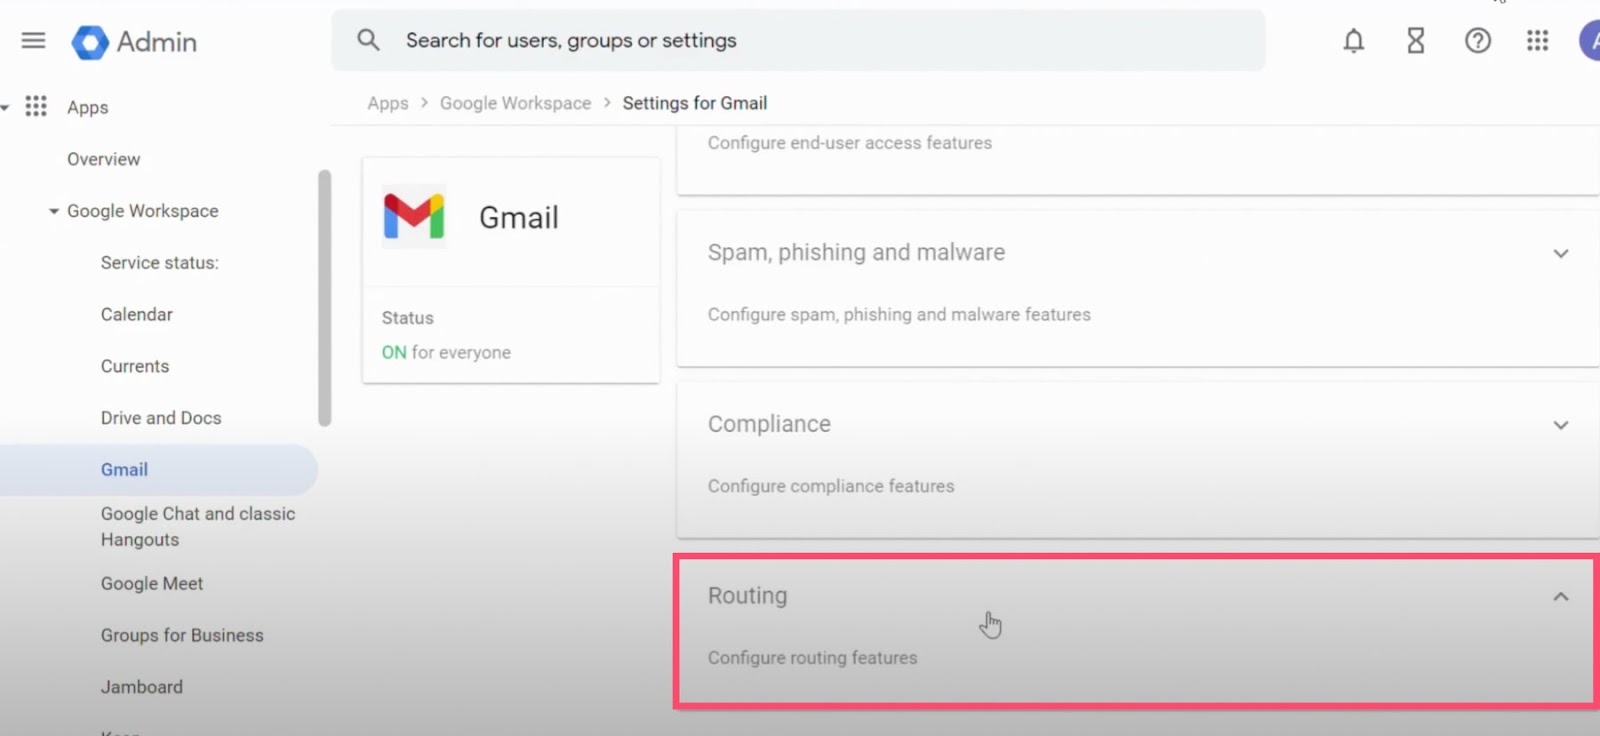
Step 2: Navigate to Gmail Settings
- Under the Admin console, navigate to the Apps & extensions pull-down list and then click on “Google Workspace.”
- Select the Gmail option to open the Gmail settings screen. From there, first, click on the “Routing tab” to configure Gmail routing rules.
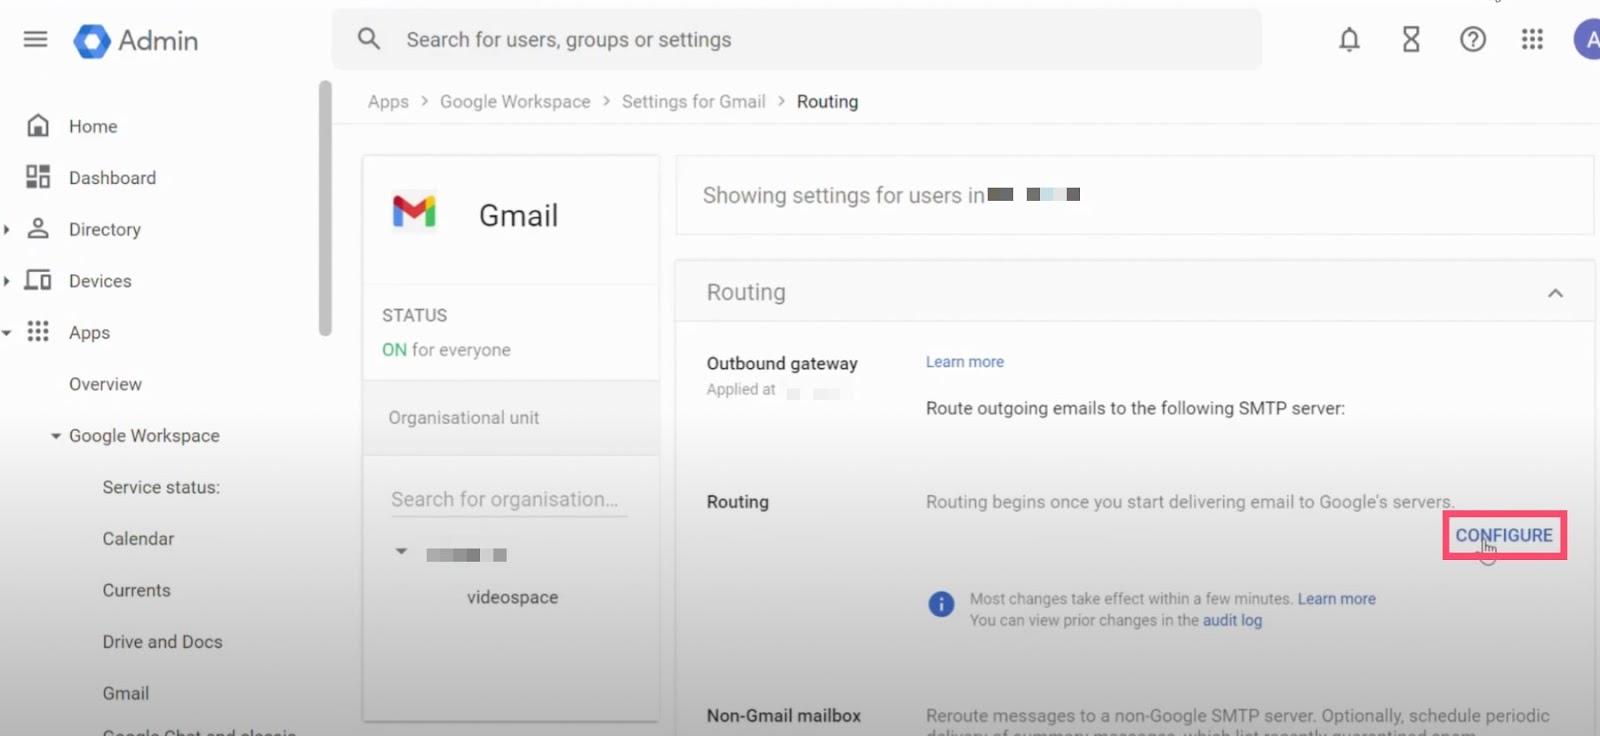
Step 3: Add or Configure Routing Rule
- If there is no routing rule currently available, click on “Add another rule” to generate a new rule.
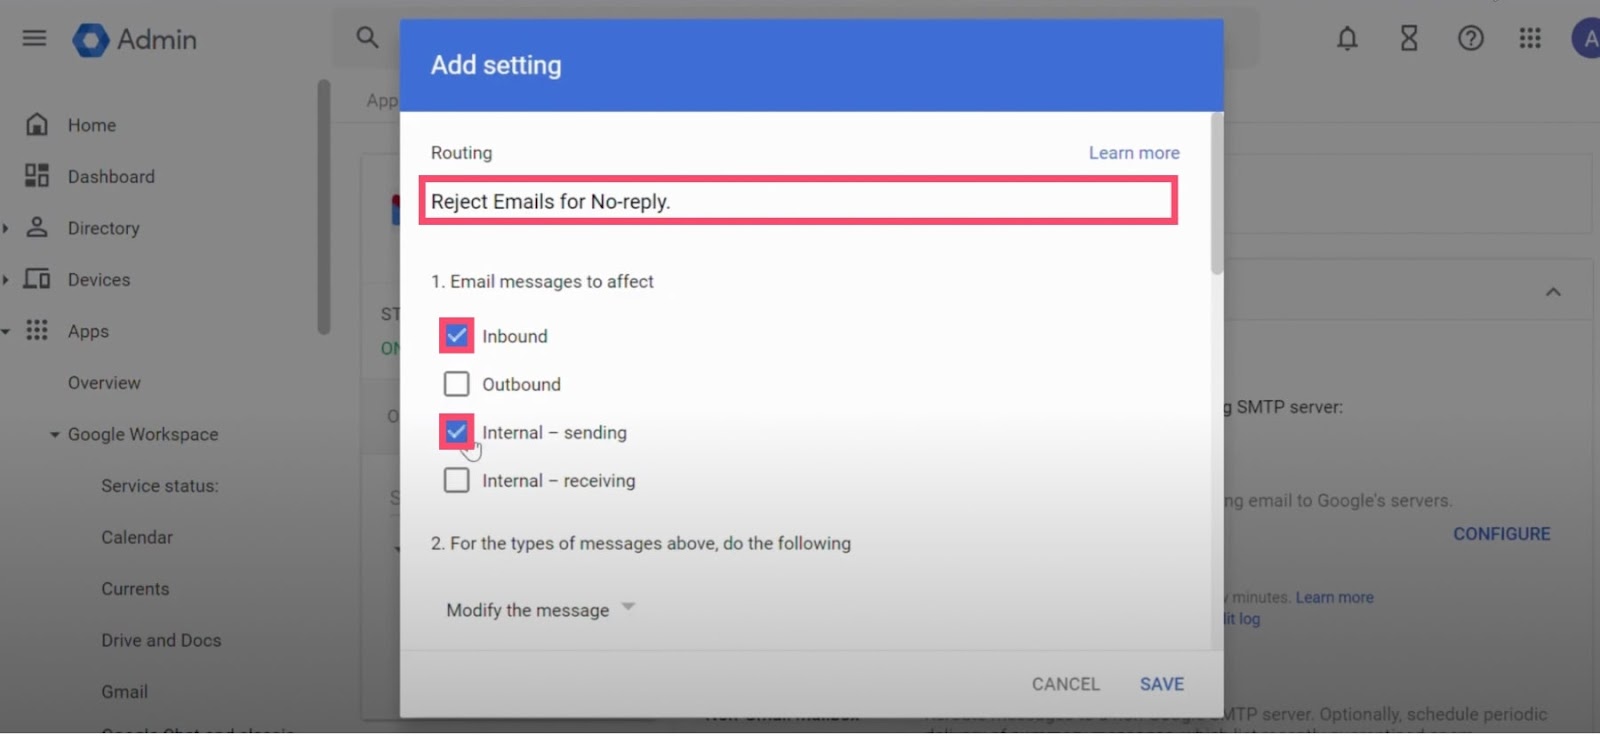
- If a rule is defined, click on the “Configure link” to review and/or change it. Label your rule to easily know its function, for example, “Reject emails for no-reply.”
Step 4: Set Email Messages to be Affected
- On the “Email messages to be affected section”, select “Inbound” to ensure the rule will operate on external emails received at the no-reply mailbox.
Step 5: Configure Rejection Message
- In Option 2, choose “Reject message” and type the message that any sender who tries to send an email to the no-reply address will receive.
Step 6: Specify User Account and Envelope Filter
- To set options for the user account affected by this rule, click “Show Options”.
- Select User under Account types to change and select “Only affect specific envelope recipients under the Envelope filter”.
Step 7: Enter No-Reply Email Address
- Select “Single email address” and enter the preferred no-reply email address(e.g., no-reply@yourdomain.com). To implement the rule, click “Save”.
Step 8: Test the Configuration
- Lastly, check the functionality of the autoresponder and the custom rejection message by sending a test email to the no-reply address from another account.
How to Create a No-Reply Mailbox in Microsoft 365?

Microsoft 360 is another popular email and enterprise solution. It offers diverse scalable plans for all use cases with intuitive Microsoft tools, including Office, Excel, Outlook, and more. It also offers an integrated ecosystem for businesses to streamline their operations and collaborate effectively across various platforms.
Setting up a no-reply mailbox policy in Microsoft 365 is an effective approach to dealing with automated emails and notices where responses are unnecessary. This process includes creating a shared mailbox and defining rules for its reception and processing of messages. This is how you can create a no-reply mailbox in Microsoft 365 to manage your automated messages without having to supervise them constantly.
Step 1: Create a Shared Mailbox
- Access the Exchange Admin Centersome text
- To perform these steps, first open the Exchange Admin Center. Go to “Recipients” and then “Mailboxes.” To begin creating a new shared mailbox, click on “Add a shared mailbox.”
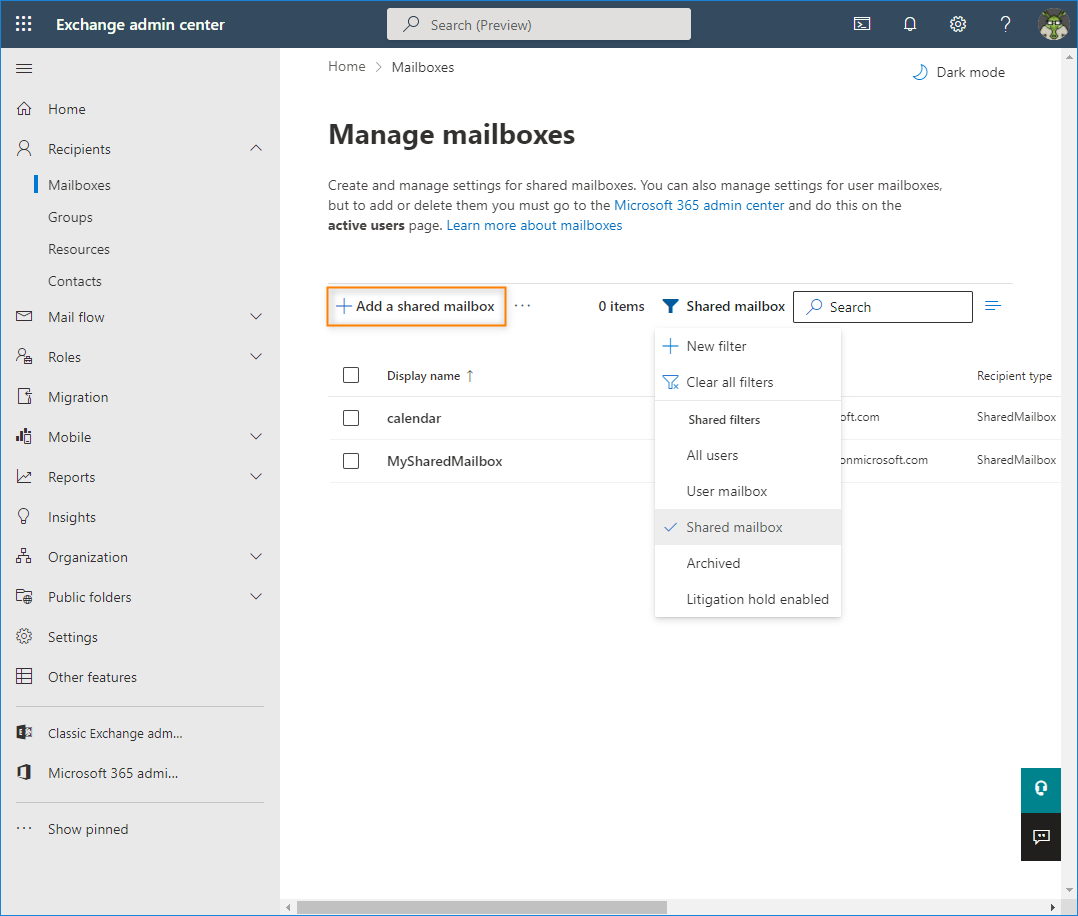
- Configure Mailbox Detailssome text
- Choose an appropriate email address and alias for the mailbox. While no-reply@example.com is common, it is recommended to use a friendly address like newsletter@example.com. Select the desired domain and its alias, and then press the ‘Create’ button.
Step 2: Add Users to the Mailbox
- Once a shared mailbox has been created, the ‘Add users to this mailbox’ option allows you to choose the people who will use this specific mailbox. These users will have Full Access and Send As permissions, which enable them to configure an out-of-office reply if needed.

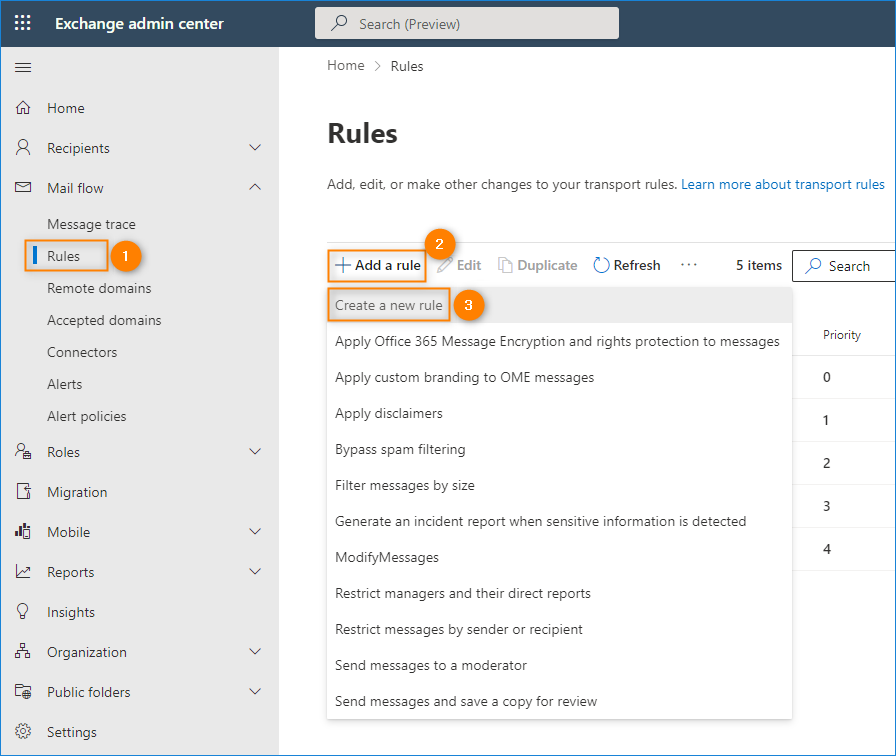
Step 3: Set Up Mail Flow Rules
1. Access Mail Flow Rules
- Click on “Mail flow > Rules” in the Exchange Admin Center. Specify “Add a rule” and choose to create a new one.
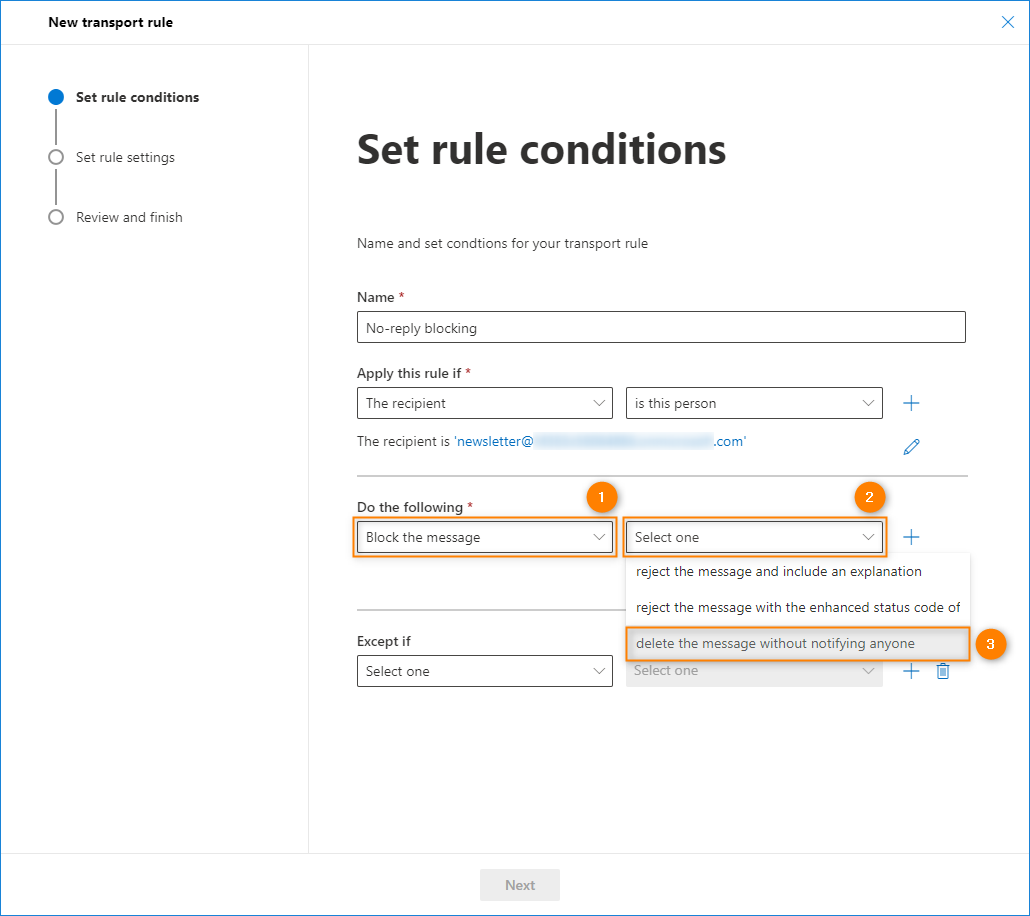
2. Configure the Rule
- Name the rule (e.g., No-reply Blocking). In “Apply this rule if”, select “The recipient > is this person” and choose the shared mailbox you created.
3. Specify Rule Actions
- To block incoming emails without being informed, go to “Block the message > delete the message without informing anyone”. If you wish to notify the sender, choose to “reject the message and include an explanation”, then type a message such as "This is a no-reply mailbox. Please visit www.example.com/contact for further assistance."
- Finalize and Enable the Rulesome text
- Go to the “Review and Finish” step and click on the “Finish” button. Activate the rule to turn it on in the rules list.
Step 4: Test Your No-Reply Mailbox
- To test your settings, send an email to the no-reply address and check that the incoming messages are processed as you have configured.
- Based on your configuration, the messages will be deleted or bounced back to you with an NDR and the explanation that you provided.
How to Create a No-Reply Email Address in Yahoo?
Over the years, Yahoo has undergone many changes in its functionalities. Yet, this email provider remains one of the most popular email platforms in the world. With its high storage volume, inbox customization features, and inbox management rules, it is a preferred choice for countless people.
The process of creating a no-reply email address on Yahoo is simple and entails creating a send-only email address. This format makes it possible to use a no-reply email address to send messages without having to check for incoming messages. Here is how you can create and configure a no-reply email address in Yahoo Mail.
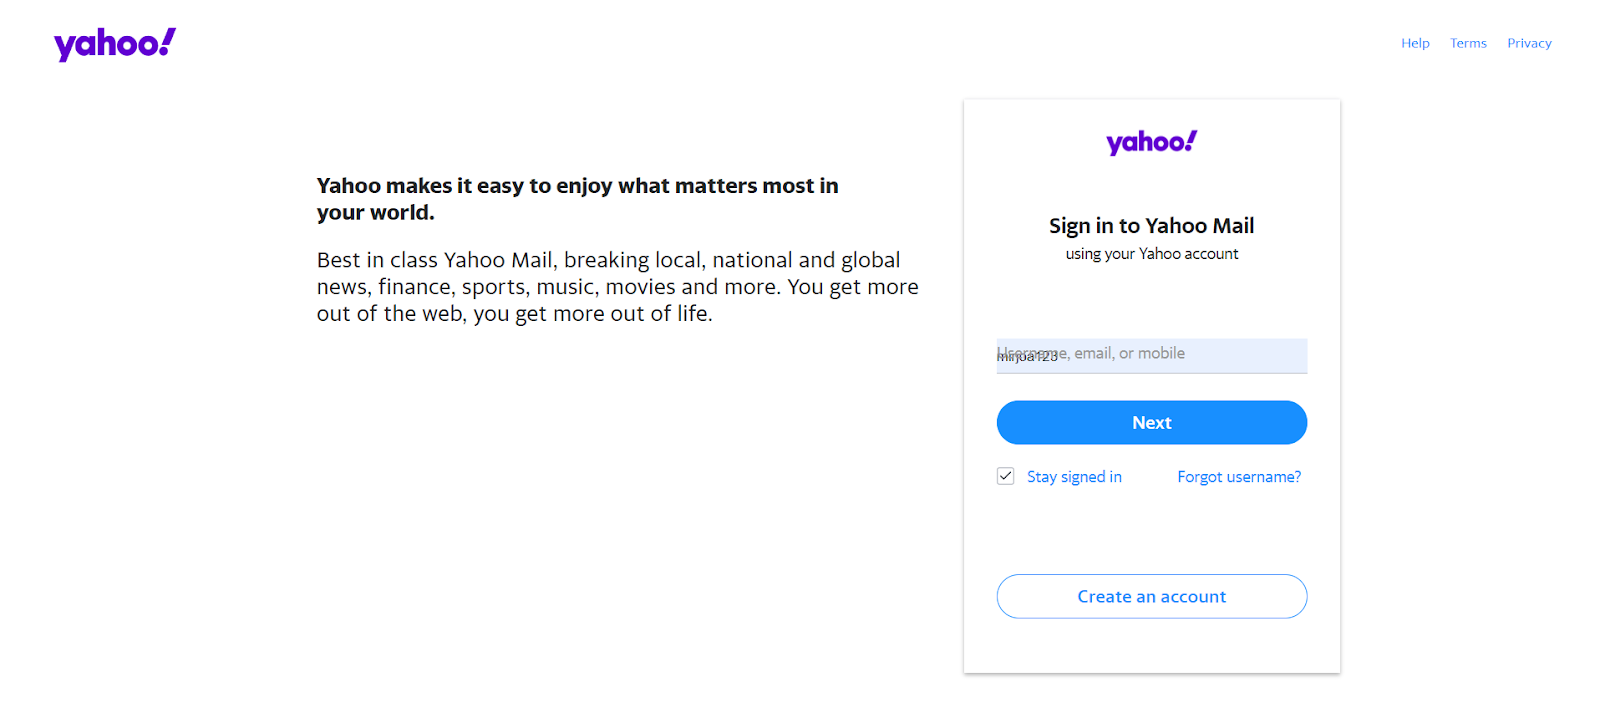
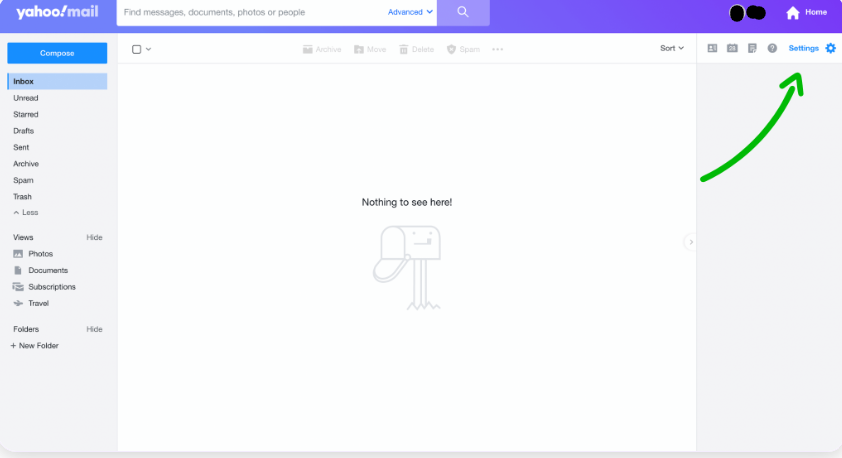
Step 1: Access Yahoo Mail Settings
- Open Yahoo Mailsome text
- To access Yahoo Mail, log into your account. In the Yahoo Mail interface, click on the “Settings” icon, which looks like a gear symbol at the top right of the page.
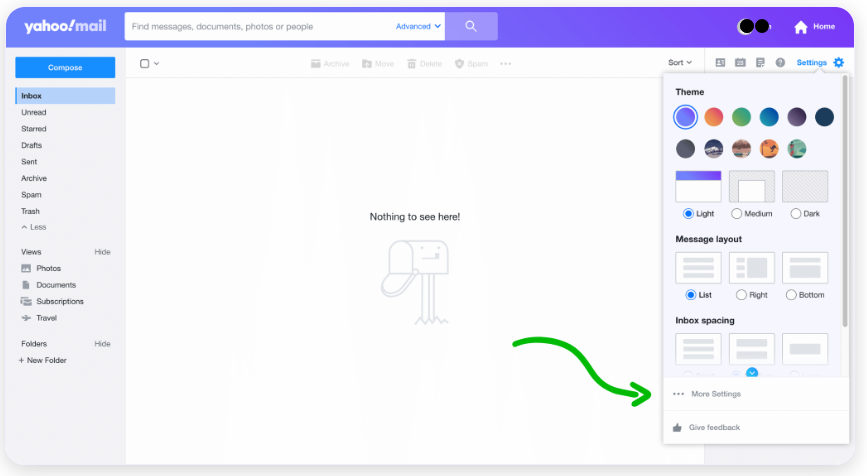
- Navigate to More Settingssome text
- For the extended options of the settings, click the “More Settings” button on the list that is given in the dropdown list.
Step 2: Add a Send-Only Email Address
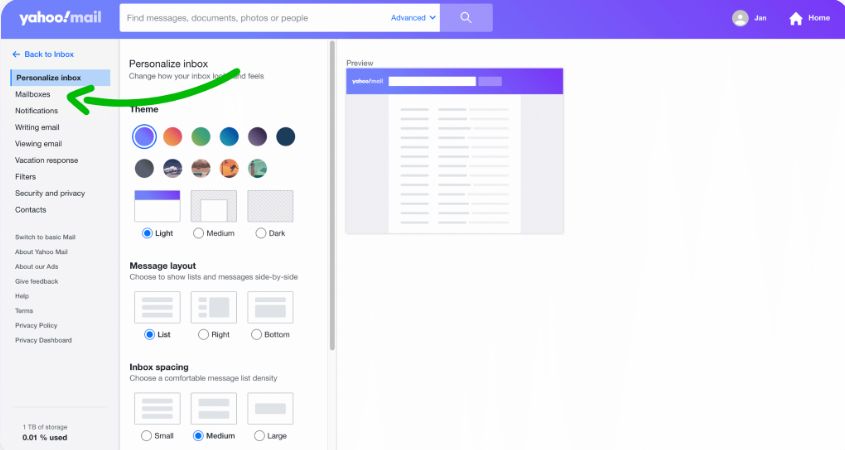
- Go to Mailboxessome text
- In the “More Settings” section, click on the “Mailboxes” option. This section helps you to control and set up your mailboxes.
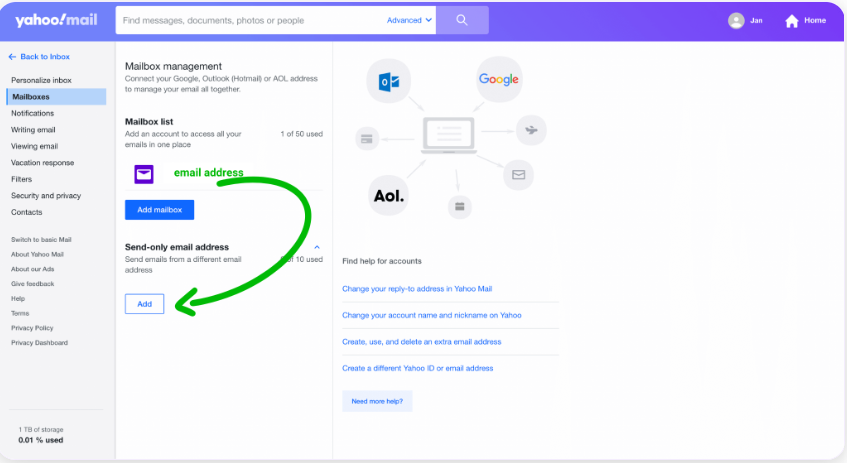
- Add a New Send-Only Addresssome text
- In the Email address section, click on the Add button in the Send-only email address field.
- Enter and Verify Your Email Addresssome text
- Type the no-reply email address of your choice (for example, no-reply@yourdomain.com), then click on “Next”. Yahoo will then ask you to confirm this address. “Click Verify” to proceed.
- Complete Verificationsome text
- Look for an email from Yahoo with the title ‘Yahoo Mail Account Verification.’ Follow the instructions provided in the email to verify your account.
Step 3: Configure and Use Your No-Reply Email
- Once verified, your no-reply email address will be integrated into your Yahoo Mail account. When sending new emails, or when answering emails, you can choose this no reply address in the “From” field.
Streamline Your Communications with Neo
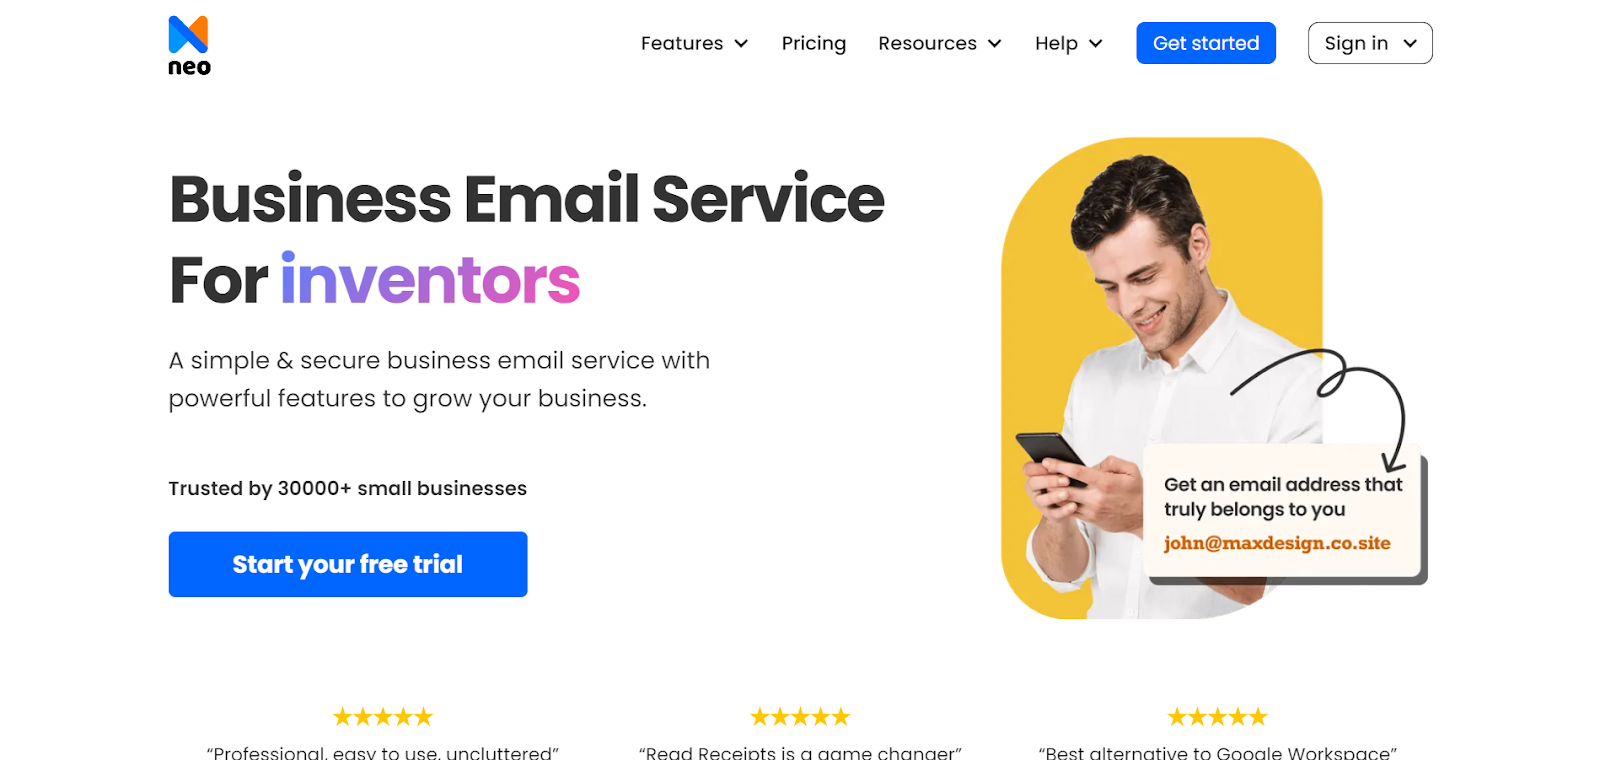
Neo is an upcoming rising star in the business and personal communication sector. This email hosting platform is the ideal option for small- and mid-sized companies. It also comes with dynamic and comprehensive features like a free one-page website with all its plans, personalized email addresses, email marketing tools, and scalable plans.
Setting up a no-reply mailbox is another straightforward method of handling your correspondence and clearing your inbox. Here's how to set one up using Neo, a reliable and versatile email service provider:
Step 1: Choose Neo as Your Email Service Provider
- Neo provides an efficient email service, including the option to set up an email address under your own domain, perfect for creating a no-reply email address. But if you do not have a domain, Neo can assist in the purchase of a .co.site easily.
Step 2: Set Up the No-Reply Email Address
- Log In: Log in to your Neo admin account.
- Navigate: Navigate to the Email Management section.
- Create: Tap on ‘Create New Email.
- Enter Details: Enter “No” for the first name, “Reply” for the last name, and use your email address as noreply@yourdomain. com. Enter your desired password and click on the “Create Email” button.
Step 3: Configure Email Settings
- Set Up Email Forwarding: If you need to read incoming messages:some text
- Log in to the Neo platform.
- Look for the “Forwarding” option in settings.
- Type the email address you want to forward messages in.
- Set Up an Autoresponder: The following message is to inform the senders that their replies will not be read: some text
- Navigate to settings and click on “Vacation Responder” or “Automatic Replies” for Gmail.
- Enable it and write a message like: “Dear [Recipient], Thanks for your email We are sorry to inform you that this is a no-reply address, your email will not be read. For any kind of query feel free to write to support@yourdomain.com .”
With Neo, it is possible to create and manage a no-reply email address to avoid replying to emails a your primary account, thus enhancing the flow of communication.
Wrapping Up!
A No-reply mailbox is an effective way of dealing with automated messages without your inbox being full. It offers a great way for businesses to not only manage their email communications but also consolidate certain processes, such as order or transaction confirmation, under one platform. In the guide, we have looked at the no-reply mailbox setup process for various email providers to help make the best choice.
On that note, if you are looking for an easy-to-navigate and feature-rich email hosting platform, then give Neo a try. Its rich webmail easily integrates with your preferred email client and lets you use email marketing features to create a free one-page website without hassle. So, sign up to Neo and enjoy a free trial today!
Frequently Asked Questions (FAQs)
Q1. Can a no-reply email address impact email deliverability?
Yes, a no-reply email address, if not well configured, will have negative implications on the sender's reputation. Hence, ensure that your domain’s SPF, DKIM, and DMARC records are set up correctly to preserve deliverability.
Q2. How can I track responses to a no-reply address?
Since no-reply addresses do not accept replies, interaction metrics like open rates and click-through rates can be tracked in email analytics.
Q3. Can I use a no-reply email address for marketing campaigns?
It is usually not advised because it may reduce the involvement of the recipient. One should consider using an email address that is monitored to deal with any queries and enhance communication with the audience.
Q4. How should I handle bounce-back messages from a no-reply email address?
Create a second email address or an automatic response to handle bounce-backs and address any problems that may arise and impact email delivery and sender reputation.
Q5. Can I use a no-reply email address for transactional emails?
Although it is possible to do so, it is advisable to include an address to which replies can be sent for transactional messages. This way, the recipients can call and raise any concerns about their transactions or seek additional help.
Get Business Email
No domain name required
Create No-reply Email
Explore Neo today!